Installing a Godaddy SSL certificate on Exchange 2013
You may or may not be surprised at how many people are still using Exchange 2013. They still need SSL like every other public facing service, so here's how to do that.
In this situation we are assuming the Exchange server is a lonely on prem server that contains all roles.
Get your cert
As of this writing (Way before I'm posting this) the way to get your cert is to go here:
https://certs.godaddy.com/cert
- Click on the cert you want to download
- Check the expiration date and be sure it's valid
- Select 'exchange' as the download type
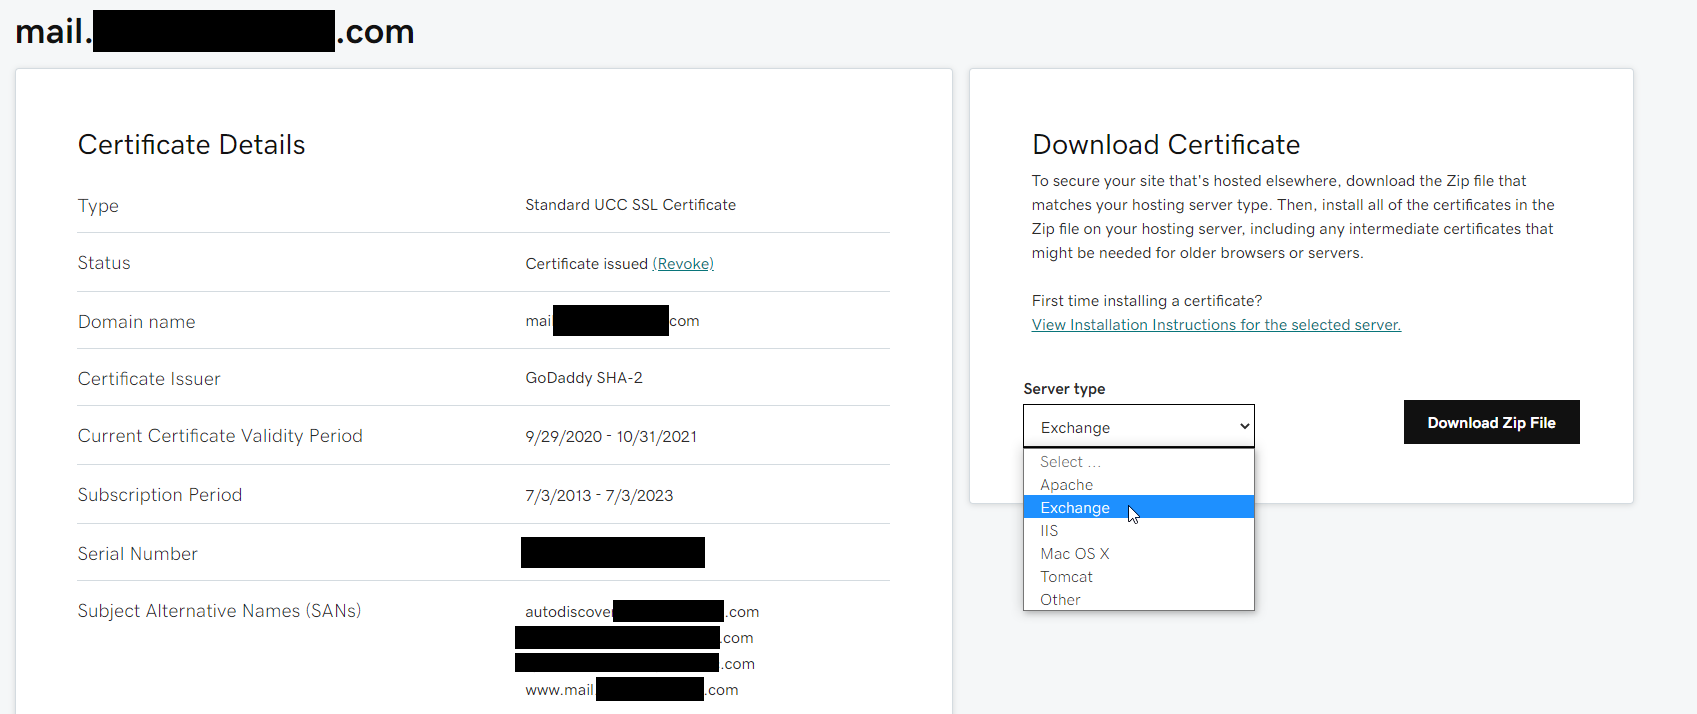
- Once downloaded, extract the zip- and rename the '.crt' file to 'yourFQDN.crt' This is not essential, but good practice. e.g. mail.mydomain.com.crt
- Move that file and the .p7b (Intermediate) file to somewhere the exchange server can reach them.
On the Exchange server:
Import the certificate
- Run
mmc.exe - File -> Add/remove snapin -> certificates -> Computer Account -> Local Computer -> Finish -> OK
- Expand the Certificates node in the left navigation panel
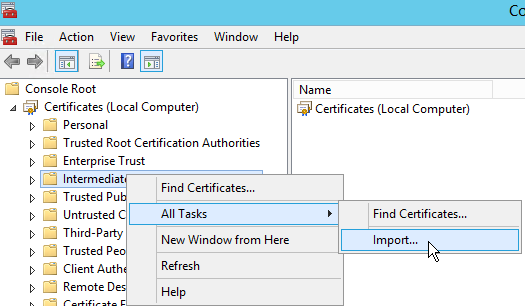
- Right click on 'Intermediate Certification Authorities' -> All Tasks -> Import
- Next->Browse
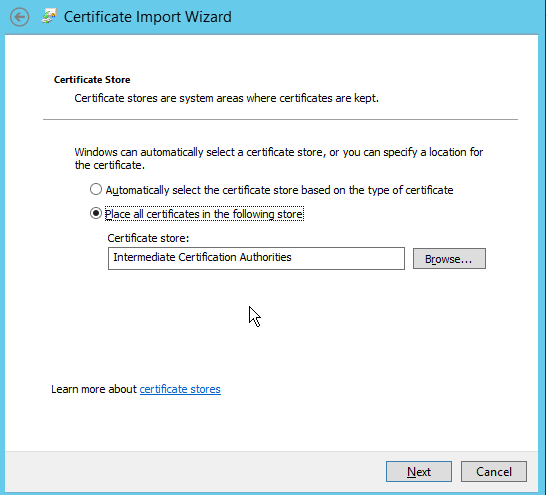
- Change the file type filter so you can find the P7B file, and select it -> Place all certificates in the following store -> If not "Intermediate Certification Authorities", then browse and select that. Next -> Finish.
- Repeat the import process with the
yourFQDN.crtfile, but on the 'Personal' certificates folder- no need to change the file type filter this time. - IMPORTANT: If you do not see the little key symbol over the cert when you import it- you need to provide a key for that cert to show up in the ECP.
 In our case, we must provide a key.
Install your certificate key
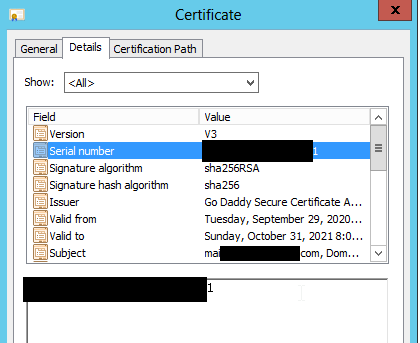
To install a key for the imported cert- Open the cert file -> Details tab -> copy the 'Serial Number' value.
Open admin cmd and type:
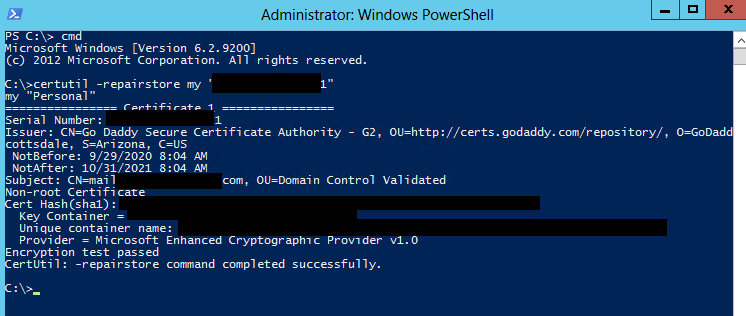
certutil -repairstore my “serialnumber”Where serialnumber is your serial number. So it would look like this:
certutil -repairstore my “xxxxxxxxxxxxxxxx”(No Spaces)You'll see a bunch of output about the cert, with a 'Encryption test passed CertUtil: -repairstore command completed successfully.' at the bottom if successful.
Refresh the MMC, and make sure the little key symbol is on the cert file.
A good practice is to check the 'friendly name' column in the mmc. If that's empty, right click on the cert file -> Properties. Enter a friendly name. 'yourDomain' should be fine. e.g. mail.yourdomain.com, keep it consistent with previous steps.

Add your certificate to Exchange
- Open a web browser, and navigate to the ECP (
https://localhost/ecp) or from any domain machine viahttps://exchangeServerHostName/ecp - Log in as an administrator
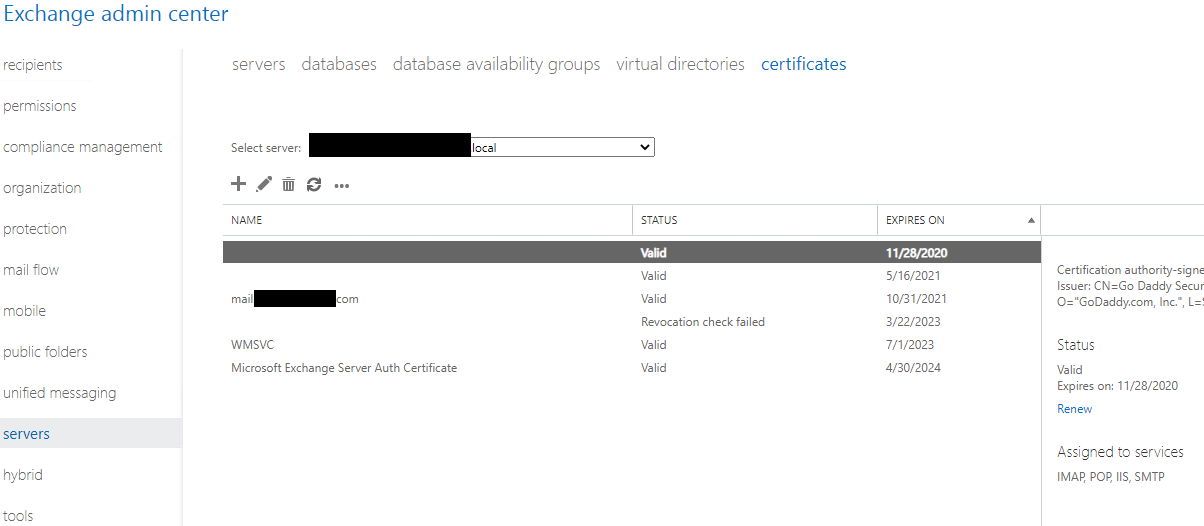
- Click "Servers" in the left navigation panel
- Select the Certificates tab.
- See why the friendly name is nice to have?
- Select the new certificate, and click the pencil icon to edit it
- Click the 'services' item in the left navigation panel
- Select the services where you want the cert enabled (For us it's SMTP, IMAP, POP, and IIS)
- Click Save.
- If you have webmail enabled, visit the URL for your webmail on this server. The certificate in the browser will show you if it's taken the new cert. Otherwise, use an SSL checker tool like Godaddy's: Certificate Checker
If you want more detailed information on the whole process, Godaddy does have articles on this.
The articles from Godaddy on this are mostly right. If you're starting from scratch and need a CSR as well, do read their article and it's previous articles on that: https://www.godaddy.com/help/exchange-server-2013-install-a-certificate-4774